

Thursday, July 18, 2013

Friday, June 21, 2013
Getting Buggy
You have all seen the question of how to get rid of bugs in materials on most fly tying forums and there is always various answers to the problem. Here are my simple rules that I have adopted to control or even eliminate bugs in my materials. My results do not infer that your results will be the same.
I try to do my best at avoiding infestation to my other materials and my house.
I don't pick up road kill (illegal to do so in a lot of areas) I let the big birds eat it
I don't want bugs in my microwave or freezer (dead or alive)
Good hackle is a major expense when it comes to tying materials.
I buy Whiting hackle (lesser chance of getting infested)
All hackles stay in original sealed packaging and stored separately in a dedicated plastic box
No hackles sit out on tying desk for days on end. They are promptly returned to original packaging after use.
I don't buy from any local chicken hackle farm. (none around anyway) I don't know whats infected.
I buy hackles at fly shops and never online. I can inspect them for multiple things and bugs is one of them.
I don't use moth balls (too stinky), pest strips or cedar balls/strips.
I add cedar scented moth ball packets to all of my hackle and feather shoe box containers.
I add pieces of clove spice to all of my hackle packages.
I never accept free animal parts from anybody!
45+ years of doing the above and no bugs in my materials or house. I must be doing something right.
Sunday, June 9, 2013
Wednesday, May 29, 2013
In Need of Flat Lead Wire?
Take your current round lead wire and flatten it with a seam roller
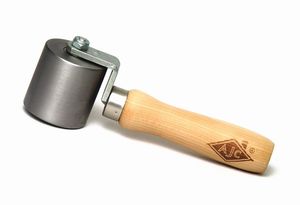
Flat nose pliers

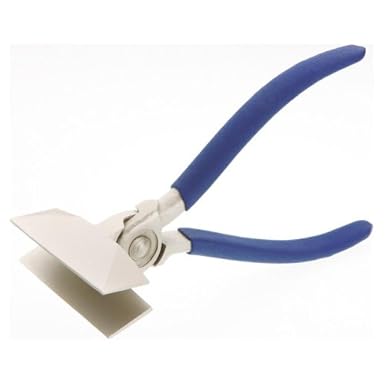
Sheet Metal Pliers
Thanks for looking
Sunday, May 26, 2013
RIT Color Guide for Dyeing Materials

Go to the following link and click on a color for its recipe.
Click in the scroll bar to change colors.
Saturday, May 4, 2013
My thoughts on fly tying kits
Here is MY thought on fly tying kits
I have never bought a kit per se. I enrolled in tying classes and the instructor laid out all of the tools and materials we were going to use for his classes and bought them in the first class.
I think experienced fly tyers have to realize that the materials in fly tying kits are not the highest quality for an experienced fly tyer to tie with but to ME they are good enough for a new tyer to simply use as practice materials. So what if a deer hair patch is a little curled up around the edges, it still can be used. So what if the hackle is not from a $150 neck, it too can still be used. So what if tying kits have materials to tie certain fly patterns, they still can be used.
I'm also sure that an experienced fly tyer could tie some pretty darn good flies from the materials in the kits even with the lower quality materials.
Not all experienced fly tyers have had the opportunity to buy and try every kit that is on the market today and give a reasonable review of each and every one. The answer from the fly tying collective is always is "dont buy a kit"!
And yes, the tying tools in kits are probably not of the highest quality that an experienced fly tyer would use but they are probably workable for a new tyer. Some tools should probably be upgraded as soon as possible or when the tyers budget allows.
Some new tyers go whole hog and buy the best that their money can buy only to find out that fly tying for them is not what its all cracked up to be and simply lose interest. Sure they can sell their stuff on craigslist or ebay or a fly tying forum but it just may have been better for them to get a kit without shelling out hundreds of dollars for something to collect dust somewhere in a basement.
It is always good to hear the ideas and comments from experienced fly tyers but not all experienced fly tyers are experienced in all aspects of fly tying. I know I am certainly not and will admit it.
Enough of my rant and I hope its helpful.
As always, thanks for looking
I have never bought a kit per se. I enrolled in tying classes and the instructor laid out all of the tools and materials we were going to use for his classes and bought them in the first class.
I think experienced fly tyers have to realize that the materials in fly tying kits are not the highest quality for an experienced fly tyer to tie with but to ME they are good enough for a new tyer to simply use as practice materials. So what if a deer hair patch is a little curled up around the edges, it still can be used. So what if the hackle is not from a $150 neck, it too can still be used. So what if tying kits have materials to tie certain fly patterns, they still can be used.
I'm also sure that an experienced fly tyer could tie some pretty darn good flies from the materials in the kits even with the lower quality materials.
Not all experienced fly tyers have had the opportunity to buy and try every kit that is on the market today and give a reasonable review of each and every one. The answer from the fly tying collective is always is "dont buy a kit"!
And yes, the tying tools in kits are probably not of the highest quality that an experienced fly tyer would use but they are probably workable for a new tyer. Some tools should probably be upgraded as soon as possible or when the tyers budget allows.
Some new tyers go whole hog and buy the best that their money can buy only to find out that fly tying for them is not what its all cracked up to be and simply lose interest. Sure they can sell their stuff on craigslist or ebay or a fly tying forum but it just may have been better for them to get a kit without shelling out hundreds of dollars for something to collect dust somewhere in a basement.
It is always good to hear the ideas and comments from experienced fly tyers but not all experienced fly tyers are experienced in all aspects of fly tying. I know I am certainly not and will admit it.
Enough of my rant and I hope its helpful.
As always, thanks for looking
Sunday, April 21, 2013
Fall Favorite

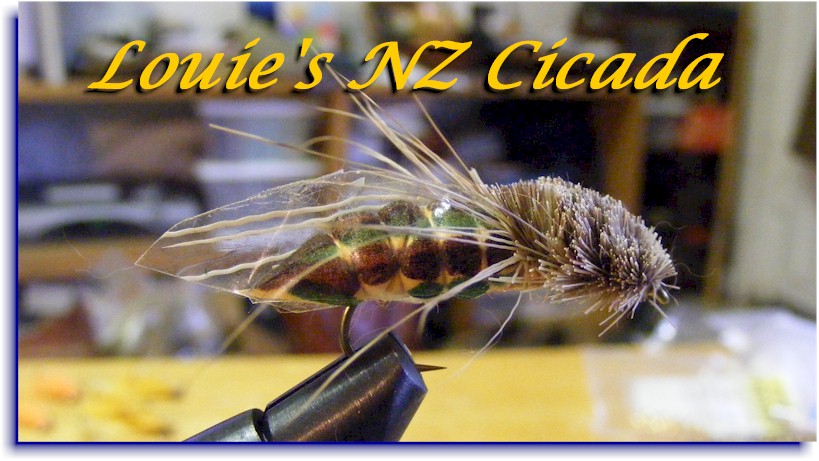
Fall Favorite
Hook - Streamer style
Thread - Black
Rib - Silver embossed tinsel
Body - Blue floss
Wing - Yellow buck tail
Throat - Red hackle
Forgotten Flies - Schmookler & Sils
Tuesday, March 5, 2013
Info Charts for the Fly Tyer
FACETED AND ROUND TUNGSTEN BEADS


BEAD SIZE
|
HOOK SIZE
|
SINK RATE (IN/SEC)
|
5/64 (.078IN / 1.98MM)
|
18 - 20
|
19.55
|
3/32 (.093IN / 2.38MM)
|
16 - 18
|
20.57
|
7/64 (.109IN / 2.78MM)
|
14 - 16
|
23.20
|
1/8 (.125IN / 3.18MM)
|
12 - 14
|
25.25
|
5/32 (.156IN / 3.97MM)
|
8 - 10
|
26.57
|
3/16 (.188IN / 4.76MM)
|
4 - 6
|
29.27
|
ROUND BEAD HEAD BEADS

BEAD SIZE
|
HOOK SIZE
|
SINK RATE (IN/SEC)
|
1/16 (.062 / 1.5MM)
|
20 - 22
|
N/A
|
5/64 (.078IN / 2.0MM)
|
18 - 20
|
13.45
|
3/32 (.093IN / 2.3MM)
|
16 - 18
|
14.88
|
1/8 (.125IN / 3.2MM)
|
12 - 14
|
15.79
|
5/32 (.156IN / 4.0MM)
|
8 - 10
|
18.21
|
3/16 (.188IN / 4.8MM)
|
4 - 6
|
21.07
|
7/32 (.218 / 5.6MM)
|
2 - 4
|
22.50
|
HOT BEADS

BEAD SIZE
|
HOOK SIZE
|
SINK RATE (IN/SEC)
|
1/8 (.125IN / 3.18MM)
|
12 - 14
|
15.79
|
5/32 (.156IN / 3.97MM)
|
8 - 10
|
18.21
|
3/16 (.188IN / 4.76MM)
|
4 - 6
|
21.07
|
TUNGSTEN CONE HEADS

BEAD SIZE
|
HOOK SIZE
|
SINK RATE (IN/SEC)
|
SMALL
3/16 (.188IN / 4.8MM)
|
4 - 6 - 8
|
25.00
|
MEDIUM
7/32 (.218IN / 5.6MM)
|
2 - 4
|
27.14
|
LARGE
1/4 (.250IN / 6.3MM)
|
1 - 2 - 4
|
29.32
|
SEED BEAD APPROXIMATE DIAMETER

BEAD
SIZE
|
INCHES
|
MILLIMETERS
|
6/0
|
.145
|
3.7
|
7/0
|
.134
|
3.4
|
8/0
|
.118
|
3.0
|
9/0
|
.102
|
2.6
|
10/0
|
.091
|
2.3
|
11/0
|
.087
|
2.2
|
12/0
|
.074
|
1.9
|
14/0
|
.063
|
1.6
|
15/0
|
.059
|
1.5
|
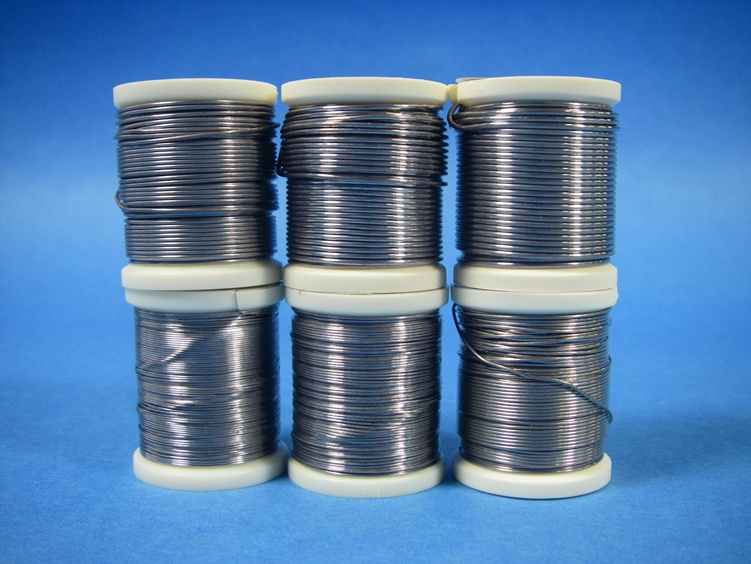
HOOK SIZE
|
WIRE SIZE
|
4 AND LARGER
|
.035
|
4 – 6
|
.030
|
6 – 10
|
.025
|
12 – 14
|
.020
|
14 – 16
|
.015
|
18 AND SMALLER
|
.010
|
DISCLAIMER
The charts shown above are simply for information only and to provide the fly tyer with a basic guide as to what fits what. The information is not carved in stone and it is up to the fly tyer should decide to use these charts or not. It should be noted that the fly tyer may opt for a different bead size for a given hook or may want to apply a different diameter of lead wire to a given hook size. Tyers preference.
Friday, March 1, 2013
Sunday, February 24, 2013
Dubbing Brushes
Are dubbing brushes a new product for fly tyers?
No! They actually date back to the late 1880s. Shown below is a couple of paragraphs from the book Floating Flies and How to Dress Them by Frederic M. Halford.
For the legs and bodies of some flies
the hair or fur of certain animals (dubbing) is used in place of ordinary
hackles; and in such cases the plan adopted is to spin or twist it on the
tying-silk for the body of the fly, taking care to put an extra thickness on to
the shoulder-end of the body, tapering it to the tail, and after the fly is
completed to pick out with the dubbing-needle a few fibres to form the legs.
There are, however, patterns in which the body is of plain silk or quill, and
the legs only of dubbing, and in these instances a somewhat more complicated
procedure is necessary.
Thoroughly wax a short length of
tying-silk and double it over the dubbing-needle, the point of which is firmly
stuck into the edge of the operating-table. Separate the fibres of the hair or
fur to be used, and lay them as much as possible horizontally across one end of
the tying-silk a, FIG 8; place the other end of the silk over and press it closely
down on the fur, FIG 9; then, taking the two ends of the silk between the
thumb and forefinger of the right hand, twist up tightly. The effect of this
will be to twist up the silk and fur between the two ends of it, as shown in
FIG 10, into a rough-looking hackle, which is used exactly like an ordinary
one, the silk representing the central quill, and the fur the fibres of the
hackle. By the same method, having a hackle of the right colour, but too long
in the fibre for the size of the hook, the dresser can, by detaching the
separate strands, laying them horizontally across a length of thoroughly waxed
doubled tying-silk, and, twisting them up as above, produce an imitation hackle
with fibres only half the length of the natural one from which they were taken.

Reference
Halford, Frederic M. (Frederic
Michael)
Floating Flies and How to Dress Them

Sunday, February 17, 2013
Brush Cap Modification

So you just got a bottle of your favorite fly tying adhesive such as one of the UV cured resins, brush on crazy glue, Sally Hansens finger nail polish or even head cement and you find the bristles are just to big to apply fine amounts in a tiny space? Just take out the brush from the bottle and wipe off the excess amount of liquid on the brush and with a pair of cheap/good scissors, trim off the bristles you don't need leaving the right amount of bristles for your application.
Be sure to wipe down you scissors after trimming the bristles.
Plain, simple and easy to do.
BEFORE

AFTER

Sunday, January 27, 2013
Fishing Places


Big Horn River, Montana

Tall Timber Lodge, New Hampshire

Salmon River, Connecticut

Hopeville Pond, Connecticut
Thanks for looking.
Tuesday, January 22, 2013
Save the Fluff

Save the Fluff
I dont normally save the remnants of hackle feathers or other materials but you can save them in a zip lock bag for reuse. The hackle tips can be used a tails on certain patterns, remove the fibers from the quill and the quill can be used as a body material and the webby material at the base of hackle feather can also be used as tailing, wings on midges and chopped up for dubbing.
Saturday, January 19, 2013


Saturday, January 5, 2013
Tying Tip #13 - Bobbin Holder Tension
When using this style of bobbin holder and you are unable to pull thread out of the tube, you will have to adjust the tension by simply spreading apart the arms that hold the thread spool. Don't spread the the arms too far or the spool will spin freely. Just find the right tension for your tying style. Bend the arms until you get it just right.
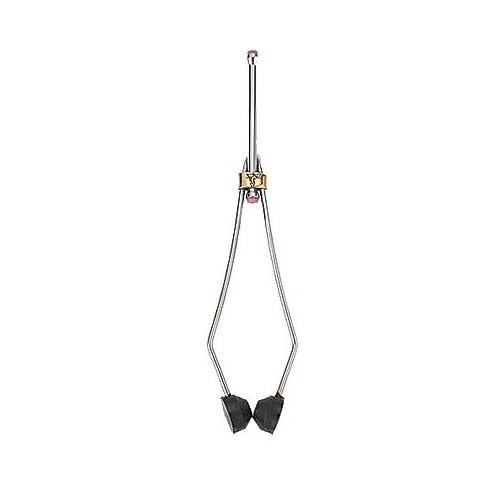
The bobbin holders shown below have other methods of adjusting the tension on the thread spool.

Stonfo

Rite

Petitjean
Sunday, December 30, 2012
Minnow (generic)

Remove a couple of STIM-U-DENTS from the package and position 1 on top of the hook shank as shown, approximately at the barb of the hook.

Switch hands and continue to hold the toothpick. Mark the toothpick for length and for the forward shape of the body as shown.


Transfer the measurement to the other toothpick and tie the toothpicks onto the hook shank. At this time, you can head cement the entire body if desired. Then tie in the marabou tail. Tying Note: you could add flat strips of lead (such as TWISTONS) along the body or a piece of lead wire along the underside of the body for a weighted version.

Tie in a strip of bills body braid (green for the back) and a strip of bills body braid (silver or pearl for the body).

Wrap the silver braid forward and tie off. Pull the back braid forward over the top of the body and tie off.

Add eyes and whatever marking you want with the acrylic paint and let dry. Coat the body of the fly with a UV resin or epoxy. overcoat with Sally Hansen's hard as nail polish if necessary.

Minnow (generic)
Hook - Mustad 9671, 9672 or equivalent
Thread - White or clear mono
Under body - Shaped stim-u-dent toothpicks
Tail - Marabou
Back - Bills body braid or equivalent
Over body - Bills body braid or equivalent
Eyes and body markings - Acrylic paint
Coating - UV resin, epoxy and Sally Hansen's hard as nails
The shown above recipe is merely a suggestion of what to use. As a creative tyer you have the option to switch items in the recipe to suit your needs or material supply.
Weighting Options


An older fly pattern known as the "JANSSEN MINNOW" can be tied in this manner. Paint up your minnow to look like them or be creative.
Thanks for looking.
Subscribe to:
Posts (Atom)