
Every photographer has their proven method of taking fly photographs. Some succeed, some do not.
The following is strictly MY take on fly photography.
I am in no way a professional photographer. Just a hobbyist still learning.
Just some tip and tricks from over the years.


The following is strictly MY take on fly photography.
I am in no way a professional photographer. Just a hobbyist still learning.
Just some tip and tricks from over the years.
CAMERAS
This is solely up to you to pick the camera which is easy to learn and fits your budget.
You may also want to consider a compact waterproof camera to take along with you when fishing.
COMPACT

DSLR

CELL PHONES

If this is your preference to use as a camera then go for it.
Admittedly I am not smart enough to be a cell phone photographer.
I have seen some excellent cell phone photography online.
MY CURRENT CAMERA
NIKON COOLPIX S9900

CAMERA TIPS
READ THE MANUAL
Somebody took the time to write it for you so why not give it a read.
It has all of the instructions and settings for your camera.
If you use the macro function, set the camera to the distance in the manual.
Its usually represented by a tulip symbol.

If you don't have macro on your camera, use the manual focus.
Its usually represented by a tulip symbol.
However, you do not have to have the camera lens nearly touching the subject to take good macro photos.
If you don't have macro on your camera, use the manual focus.
Check and set the white balance of your camera for the lighting you intend to use - it's in the manual on how to do it.
Do not use digital zoom.
Turn off the cameras flash.
More megapixel cameras are not necessary to take fly photos.
Depress the shutter 1/2 of the way down to let the camera focus on the subject. Once focused, depress the shutter the rest of the way down to take the photo (this seems to be the problem on most forums I frequent - out of focused photos and the photographer wants critiques).
Use the self-timer if that's the way you want to take the photo (not really necessary)
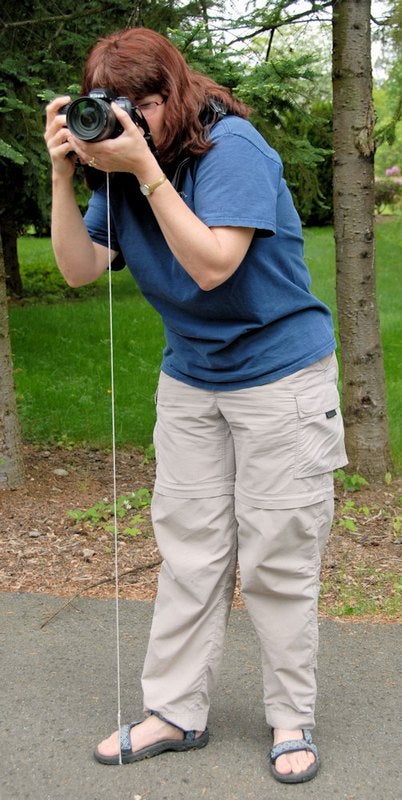
TRIPODS
Use a tripod to stabilize your camera.
There are many options to choose from as well as price points.


There are many options to choose from as well as price points.

Table Top

Floor/Ground
Even a string tripod
Use a background color that is pleasing to the eye.
Your filthy and disorganized fly-tying area is NOT pleasing to the eye.
Light blue, gray or light green are good choices.
Take a look at the fly photography of Charlie Craven and Hans Weilenmann for examples.
Their photos of flies are excellent.


Your filthy and disorganized fly-tying area is NOT pleasing to the eye.
Light blue, gray or light green are good choices.
Take a look at the fly photography of Charlie Craven and Hans Weilenmann for examples.
Their photos of flies are excellent.

Background ideas for fly photography:
I was at Home Depot and walked by the paint department.
There were paint chip sample all over the place and all for free.
So, I picked of a few of them in eye pleasing colors.
There were paint chip sample all over the place and all for free.
So, I picked of a few of them in eye pleasing colors.

More free ideas came when I went by the kitchen cabinet and countertop department.
They also have free samples of countertop material.
They also have free samples of countertop material.

Another department is floor and wall tiles.
These may not be free, but you are only buying 1 tile for a background.

These may not be free, but you are only buying 1 tile for a background.

Those 39-cent foam sheet from the hobby store or department will work for backgrounds.
Different color paper from the scrapbooking department.
Different color paper from the scrapbooking department.

Wood scraps that have been stained or painted work too!


Don't forget about items from nature.
Rocks, twigs, moss, logs, bark, weathered wood etc. will all work as backgrounds
MY CURRENT BACKGROUND

Typist Paper Holder

I basically use tan, blue and gray colored papers for backgrounds
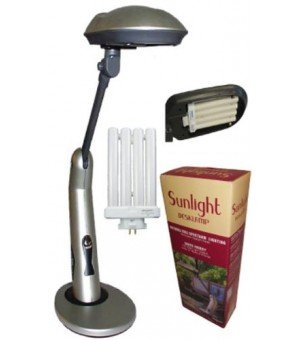
LIGHTING
Here is my current setup.
I prefer to take my photos directly at my tying area.
Here is my current setup.
I prefer to take my photos directly at my tying area.


I use 2 full spectrum daylight lamps that I purchased from my local Home Depot.
Ott lights offer the same amount of light for double/triple the price.
Totally up to you which one to choose.


My setting are as follows
1. Aperture mode
2. No flash
3. Macro mode
4. f6.3 f stop
5. Camera set to 8 megapixels
6. Shutter speed
7. ISO speed picked by the camera
I also use the Sunpak VL-LED-96 Compact Video Light that I can hold below the subject for additional light.

I recently purchased this Litra Torch and I'm having
good results using this small handheld 1.5-inch cube.

PHOTO STUDIOS AND LIGHT BOXES
If you want to use a light box, then buy one or make one.
Here is one that I bought but seldom use.
There are so many places on the web on how to make one or buy one
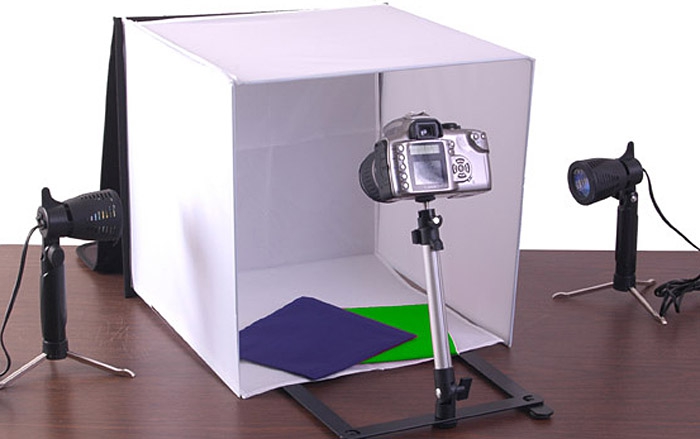

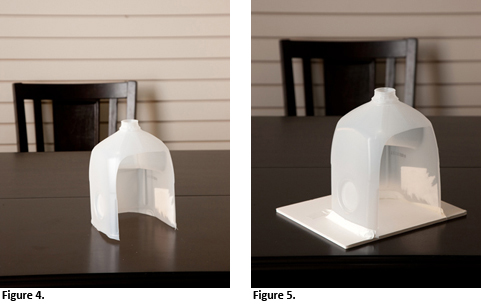
PHOTO EDITING SOFTWARE
Photo editing software come in a couple of categories: free and you have to pay for it.
Free is for me. I am not a professional photographer and never wanted to be one.
I use free software that can be downloaded from the internet.
I personally use a free editing software called "Photoscape X Pro".
It allows me to resize my photos and do editing as well.
Free is for me. I am not a professional photographer and never wanted to be one.
I use free software that can be downloaded from the internet.
I personally use a free editing software called "Photoscape X Pro".
It allows me to resize my photos and do editing as well.
Other free software is: Gimp, Photofiltre, Microsoft Paint etc.
There are photo hosting websites that allow you to edit your photos.
There are photo hosting websites that allow you to edit your photos.
If you want to pay for editing software, there is: Photoshop, Paint Shop Pro etc.
I use Postimage photo hosting website to store my photos.
I use Postimage photo hosting website to store my photos.
Re-size your photographs. Nobody likes to scroll side to side to see your photograph.
I create a folder on a portable hard drive for every fly pattern I tie. I keep 2 versions of the fly photo: Original size (straight out of the camera) and a resized version @ 1080 pixels wide. I upload the 1080-pixel wide version to my photo hosting website for use on forums/bulletin boards.
I create a folder on a portable hard drive for every fly pattern I tie. I keep 2 versions of the fly photo: Original size (straight out of the camera) and a resized version @ 1080 pixels wide. I upload the 1080-pixel wide version to my photo hosting website for use on forums/bulletin boards.
Before Editing

After Editing


After Editing


FINAL THOUGHTS
Find the equipment and setup that works for YOU.
Be as frugal or extravagant as you want.
Find the equipment and setup that works for YOU.
Be as frugal or extravagant as you want.
Be creative! Experiment!
4 comments:
Norm thanks for the photography tutorial I always admire your work, you are a great inspiration with a simple set up I would have thought you moved the vise and flies into a small studio.
thanks chris
Very nice entry, interesting things can be found :)
This has really helped me out, thanks for sharing this. Just starting to produce flies that I'm really happy with but my pics don't seem to do them justice. Hopefully this turns it around 🙂
Post a Comment